Intro to Fabrication - Week 1
14 Sep 2016
courses, documentation, fabrication
Our assignment for Week 1 of Intro to Fabrication was to build a flashlight.
I'm pretty sure I've had this assignment as some point in the past, so I knew I need to have:
- A battery
- A light
- Some wires
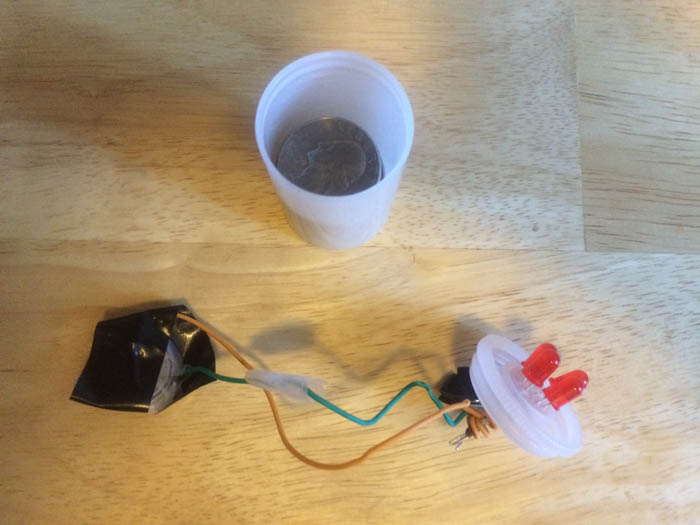
Thankfully, I had my pcomp kit, so I was prepared with wires and LED lights. I dug through my closet and found a battery for an old digital camera, which worked to power the LED lights.
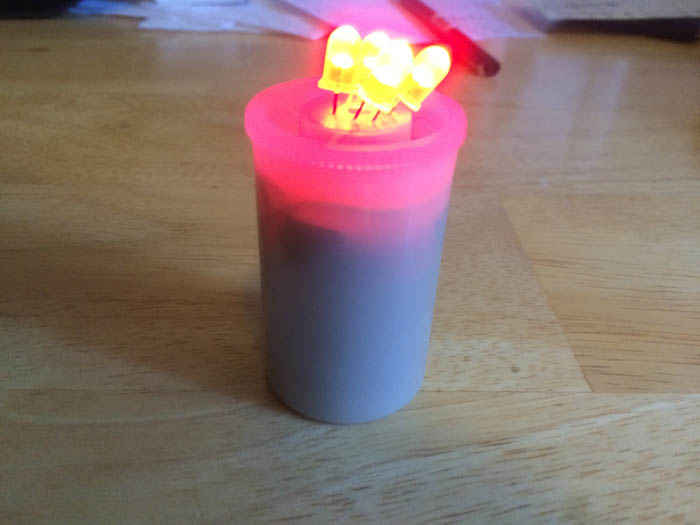
The challenging part was deciding how to encase these materials, and then creating an on/off switch for the light. After rummaging around my apartment, I found a 35mm film canister that I liked because it had the (general) shape of a small portable flashlight. I was able to fit the battery inside the canister and poked holes in the lid to stick the lights in.
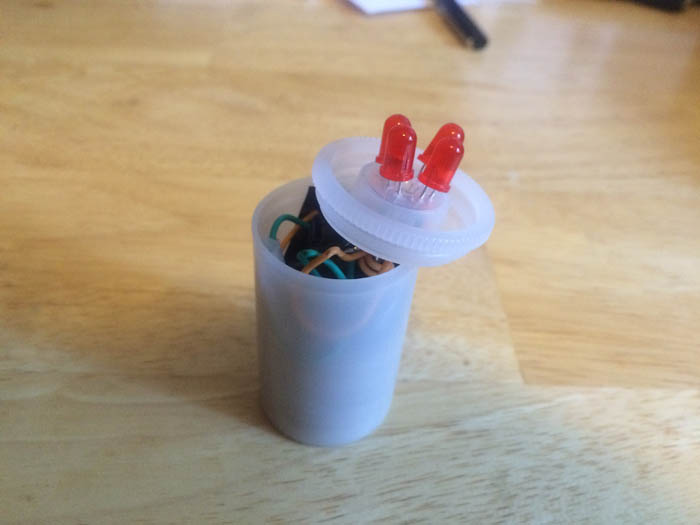
The next challenge was how to make a switch. The switches that came in my pcomp kit didn't work because they opened the circuit when pushed. Meaning, the flashlight is always on and only turns off when you push the button. The opposite of what I wanted. Since the canister came with a lid, I thought I would figure out some way to use the movement of opening and closing the lid as the switch. To do so, I stacked a bunch of quarters in the canister and placed the battery on top. This worked, albeit imperfectly, and what I needed was some cushioning between the top wire touching the battery so that when the lid was finally snapped shut, it would provide the right amount of pressure to close the circuit and the circuit would be open under any other circumstance. The solution I came up with was to tape a little bit of toilet paper between the battery and the wire so, without any outside force, the circuit would be open. But once the lid was closed, the pressure of the lid against the stack of quarters would press the wire through the toilet paper onto the battery. Voilà!
- Email: coblezc@gmail.com
Twitter: @coblezc - CC-BY